 CaterPrepper
A smart modular coat rack shaped like a caterpillar that physically reacts to live weather and your personal schedule, helping you prepare for the day.
CS 320 · Team 5
The Team
Problem Statement
Rushing out the door in the morning, many of us forget essential items: a coat when it's cold, an umbrella when it's raining, keys we'll need later. Phone-based reminders don't solve this well: notifications are easy to swipe away, and "alert fatigue" means we stop paying attention to them altogether.
Daily preparation ends up feeling like an invisible mental checklist. There's no physical, ambient feedback loop that ties the act of leaving the house to the items you actually need.
CaterPrepper addresses this gap by turning the coat rack itself into the reminder systems. Using tangible cues (light, vibration, sound) instead of screen-based notifications, embedded in an emotionally engaging caterpillar form that makes the routine feel like caring for a companion rather than checking a list.
Conceptual Design
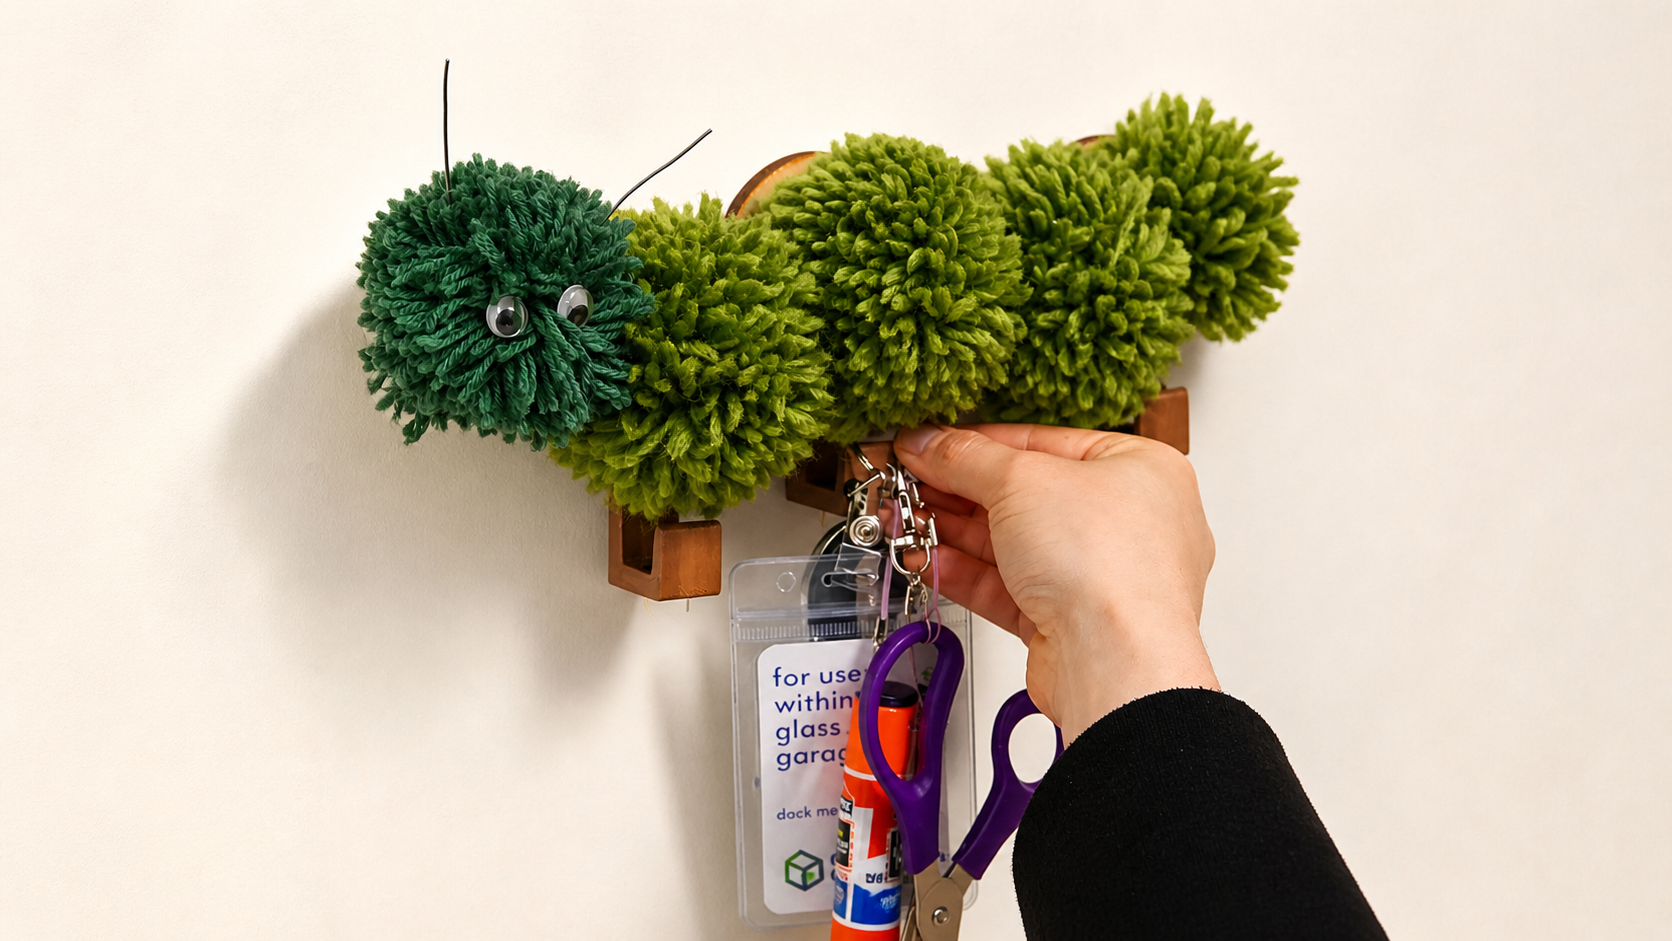
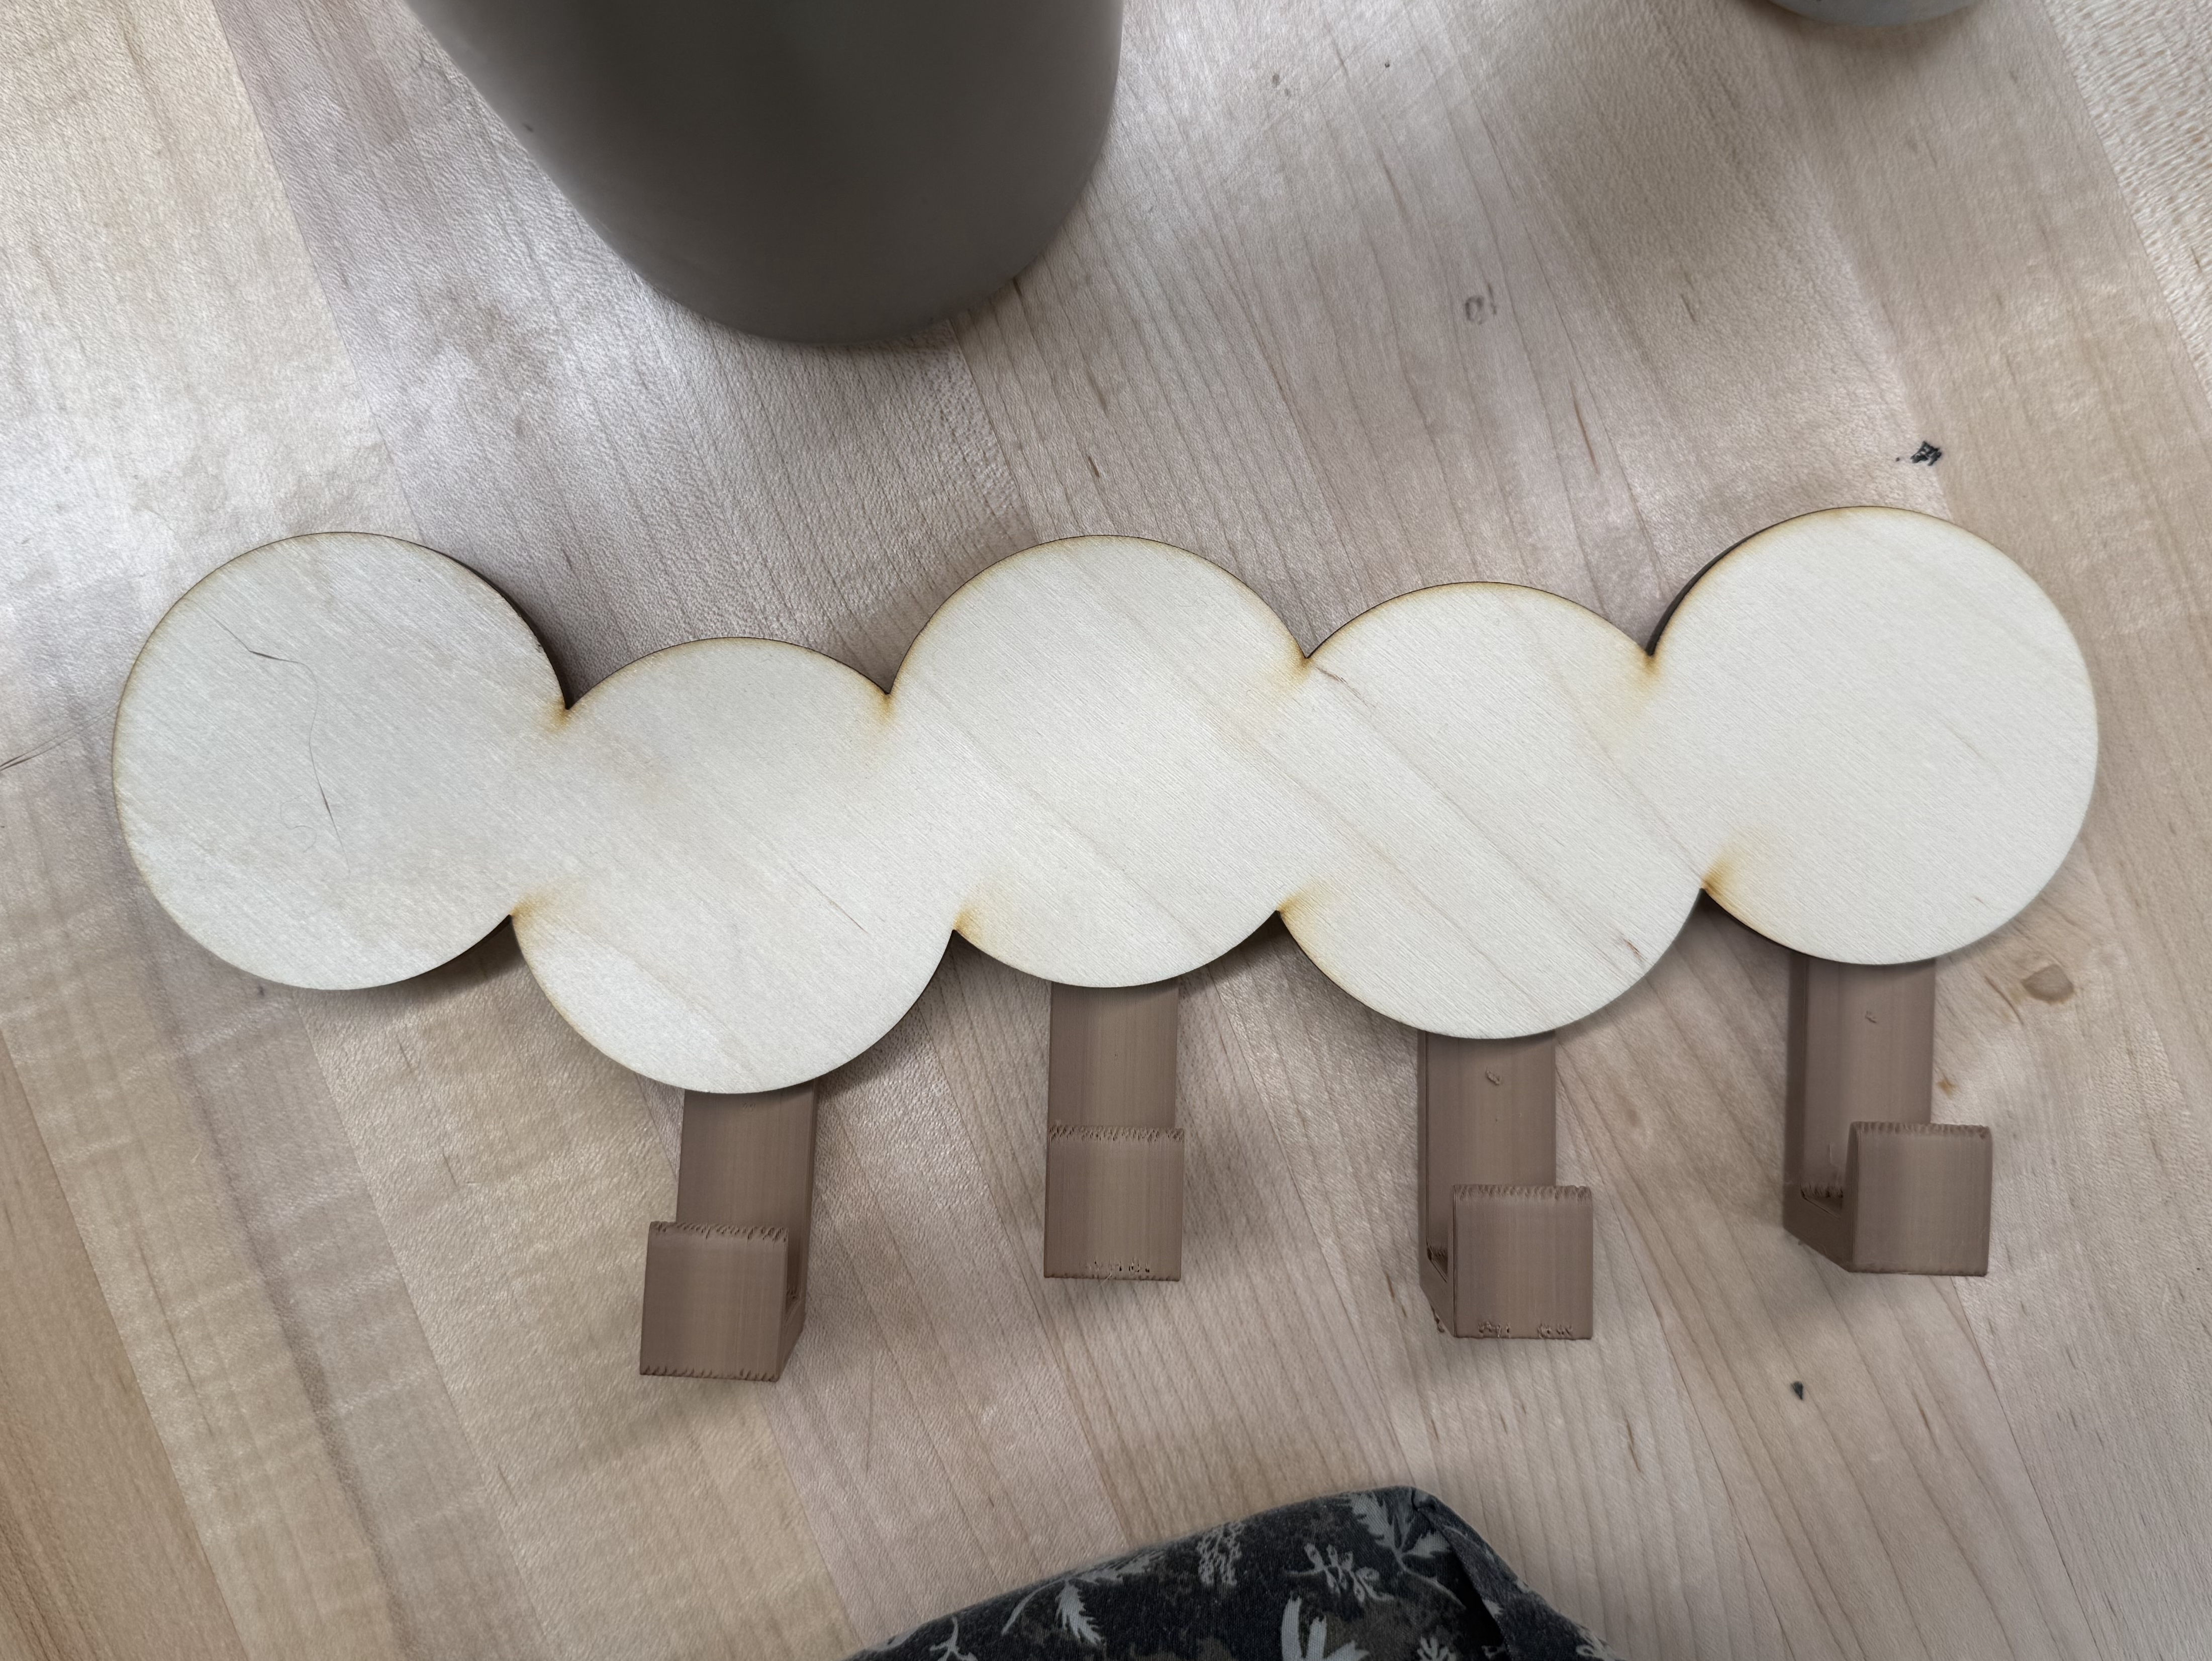
CaterPrepper is a wall-mounted or tabletop caterpillar with modular body segments, each equipped with a hook and a reed switch. Users hang items on the hooks using small magnets. When you're ready to leave, you tap the caterpillar's touch sensor, and it walks you through collecting your things.
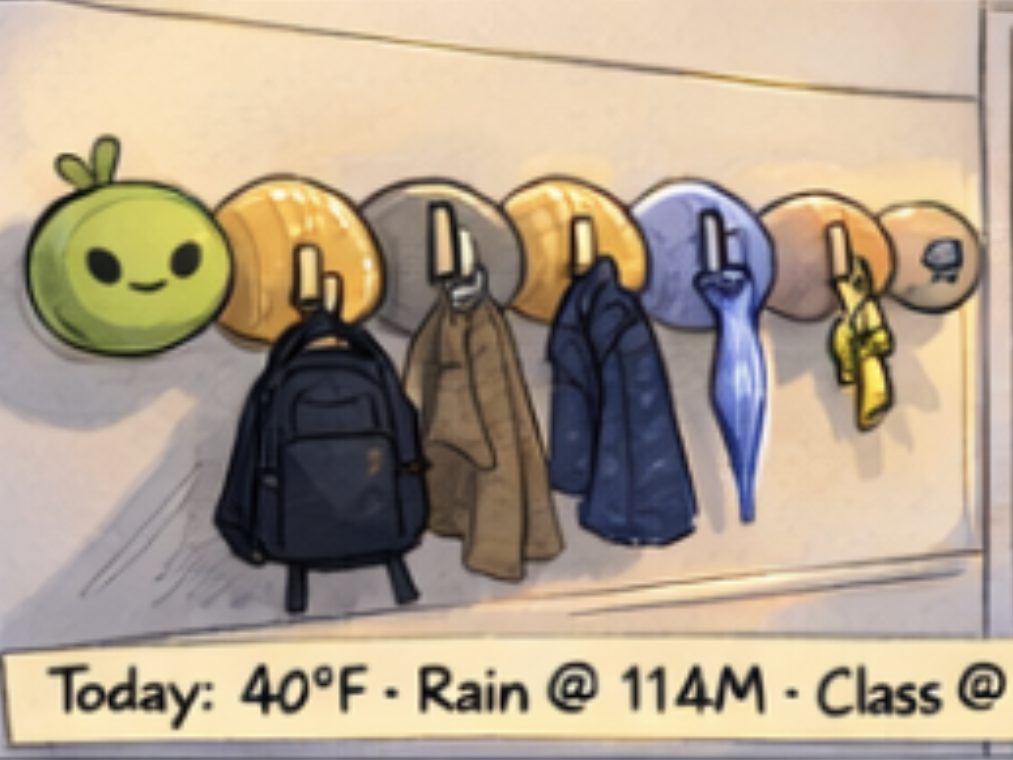
Sketches & Diagrams
Early concept sketches showing the caterpillar form factor, feedback states, and attachment interaction model.
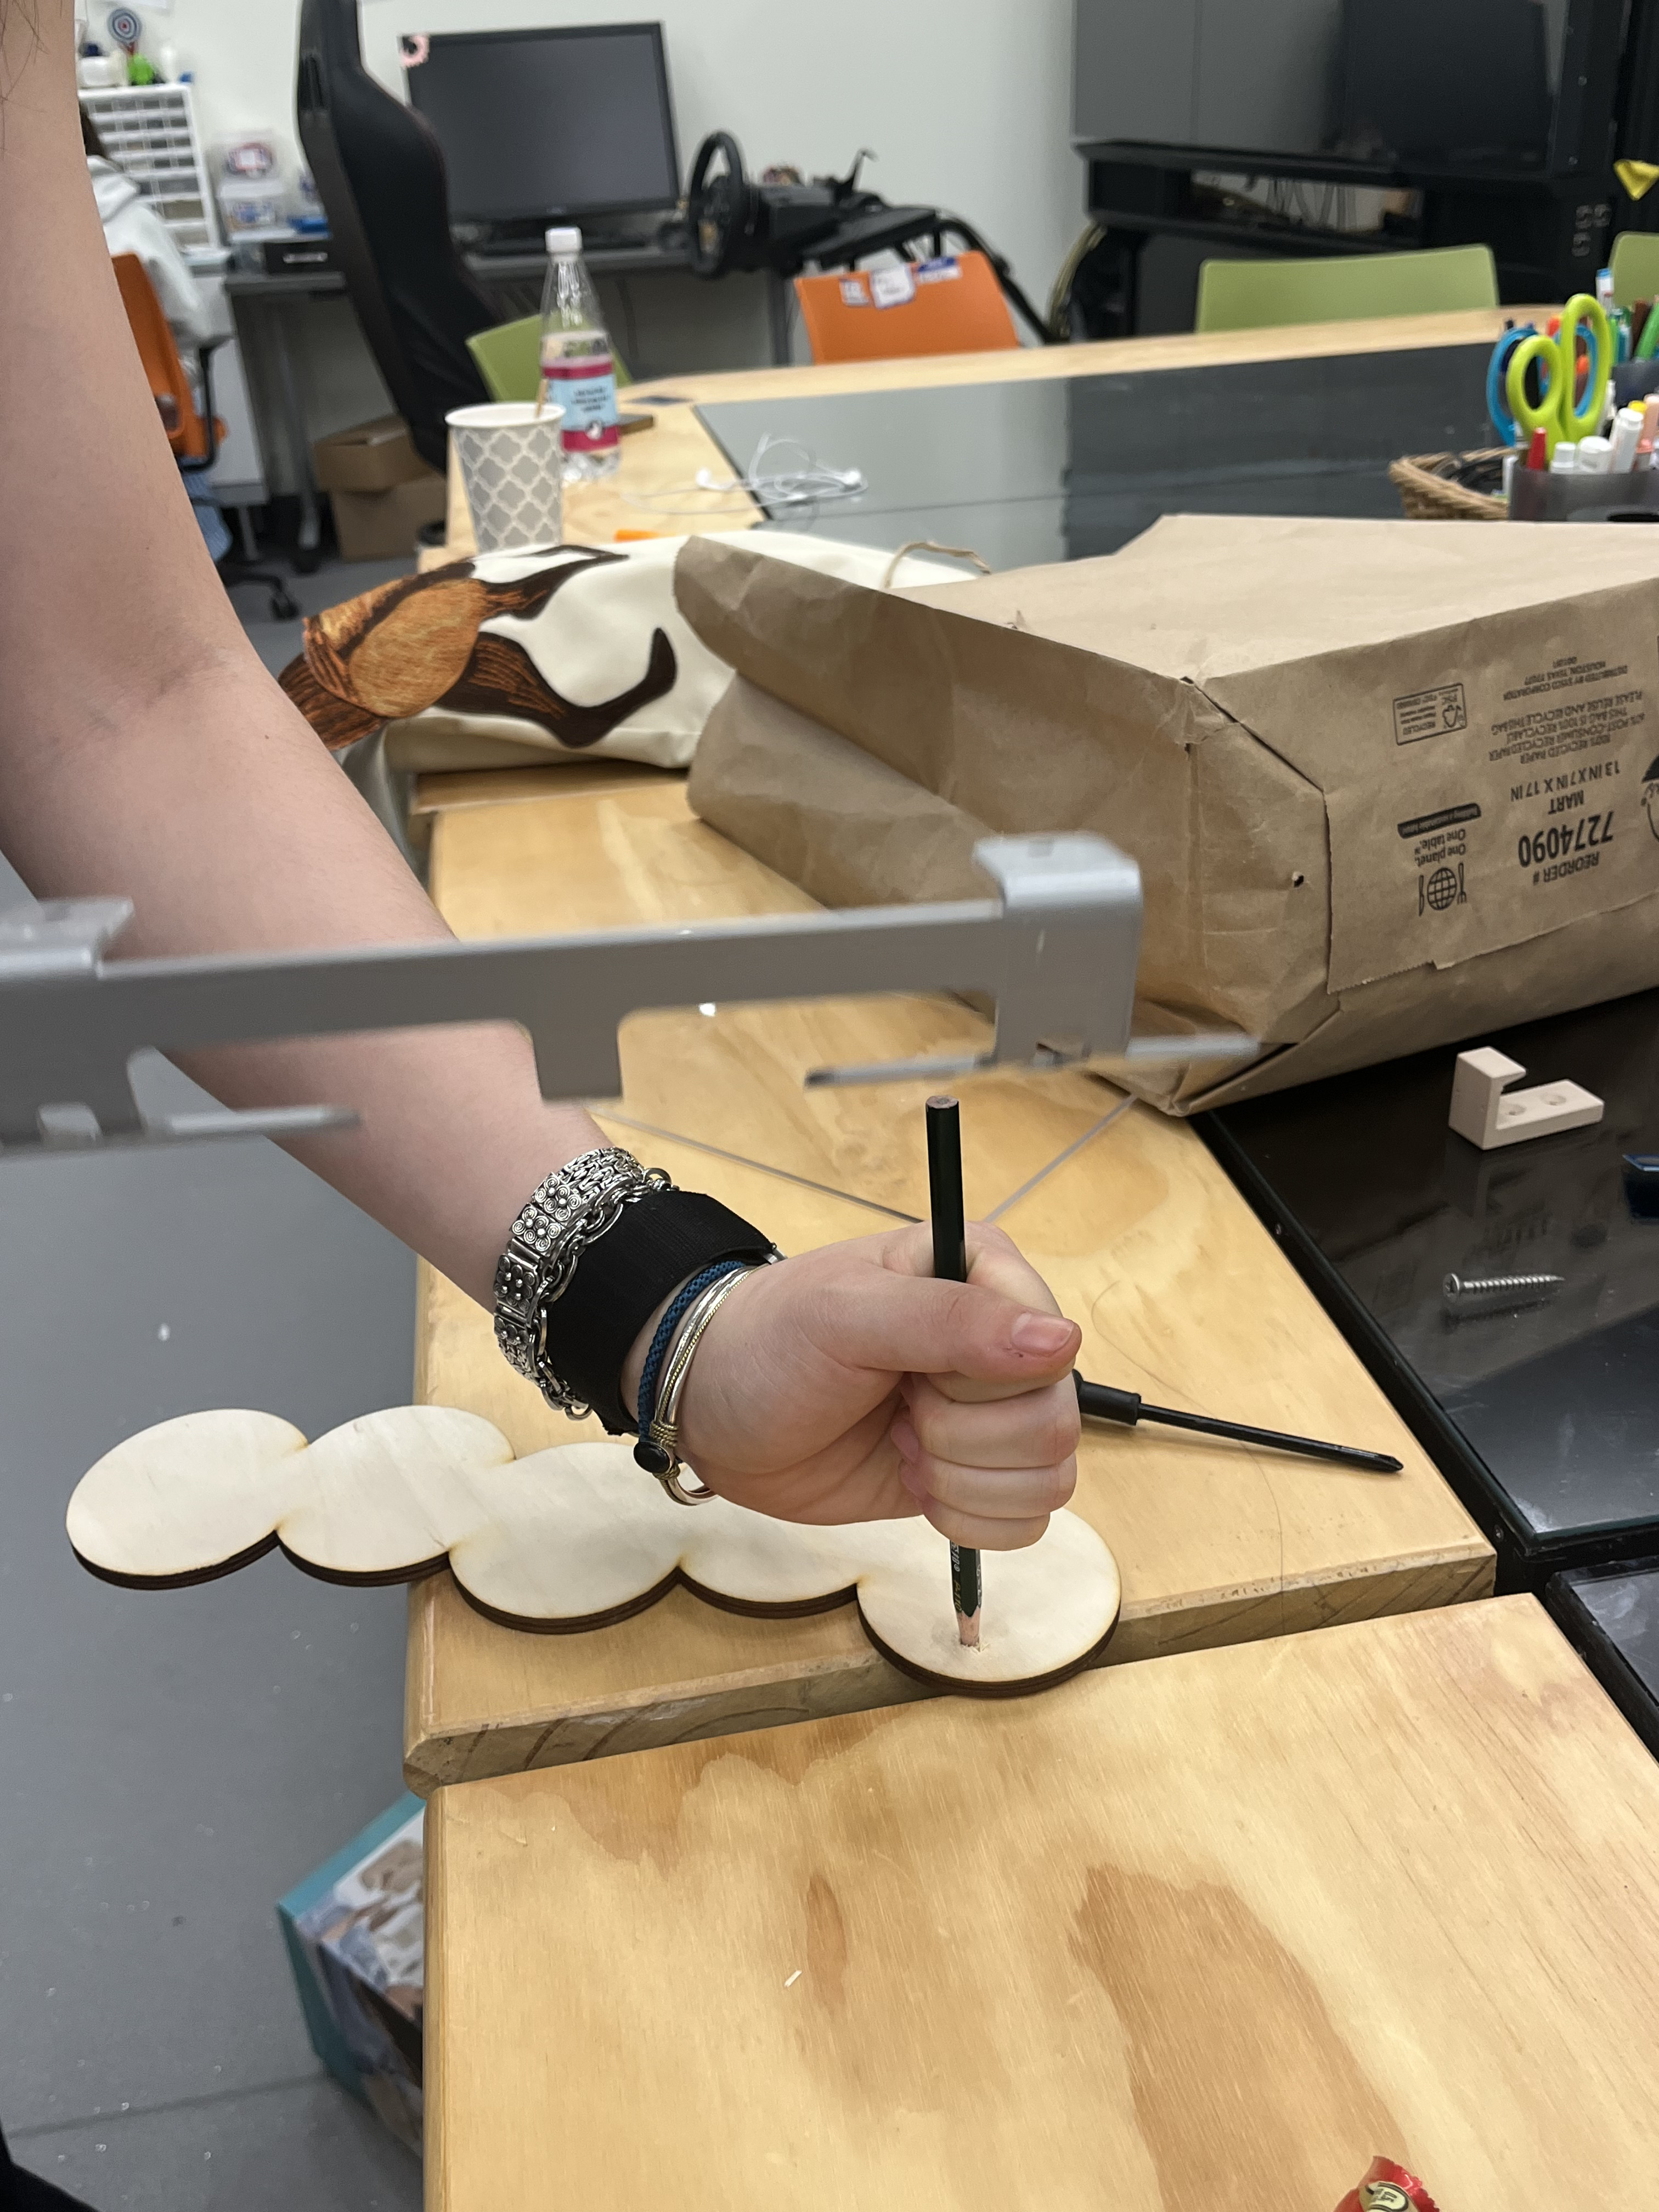
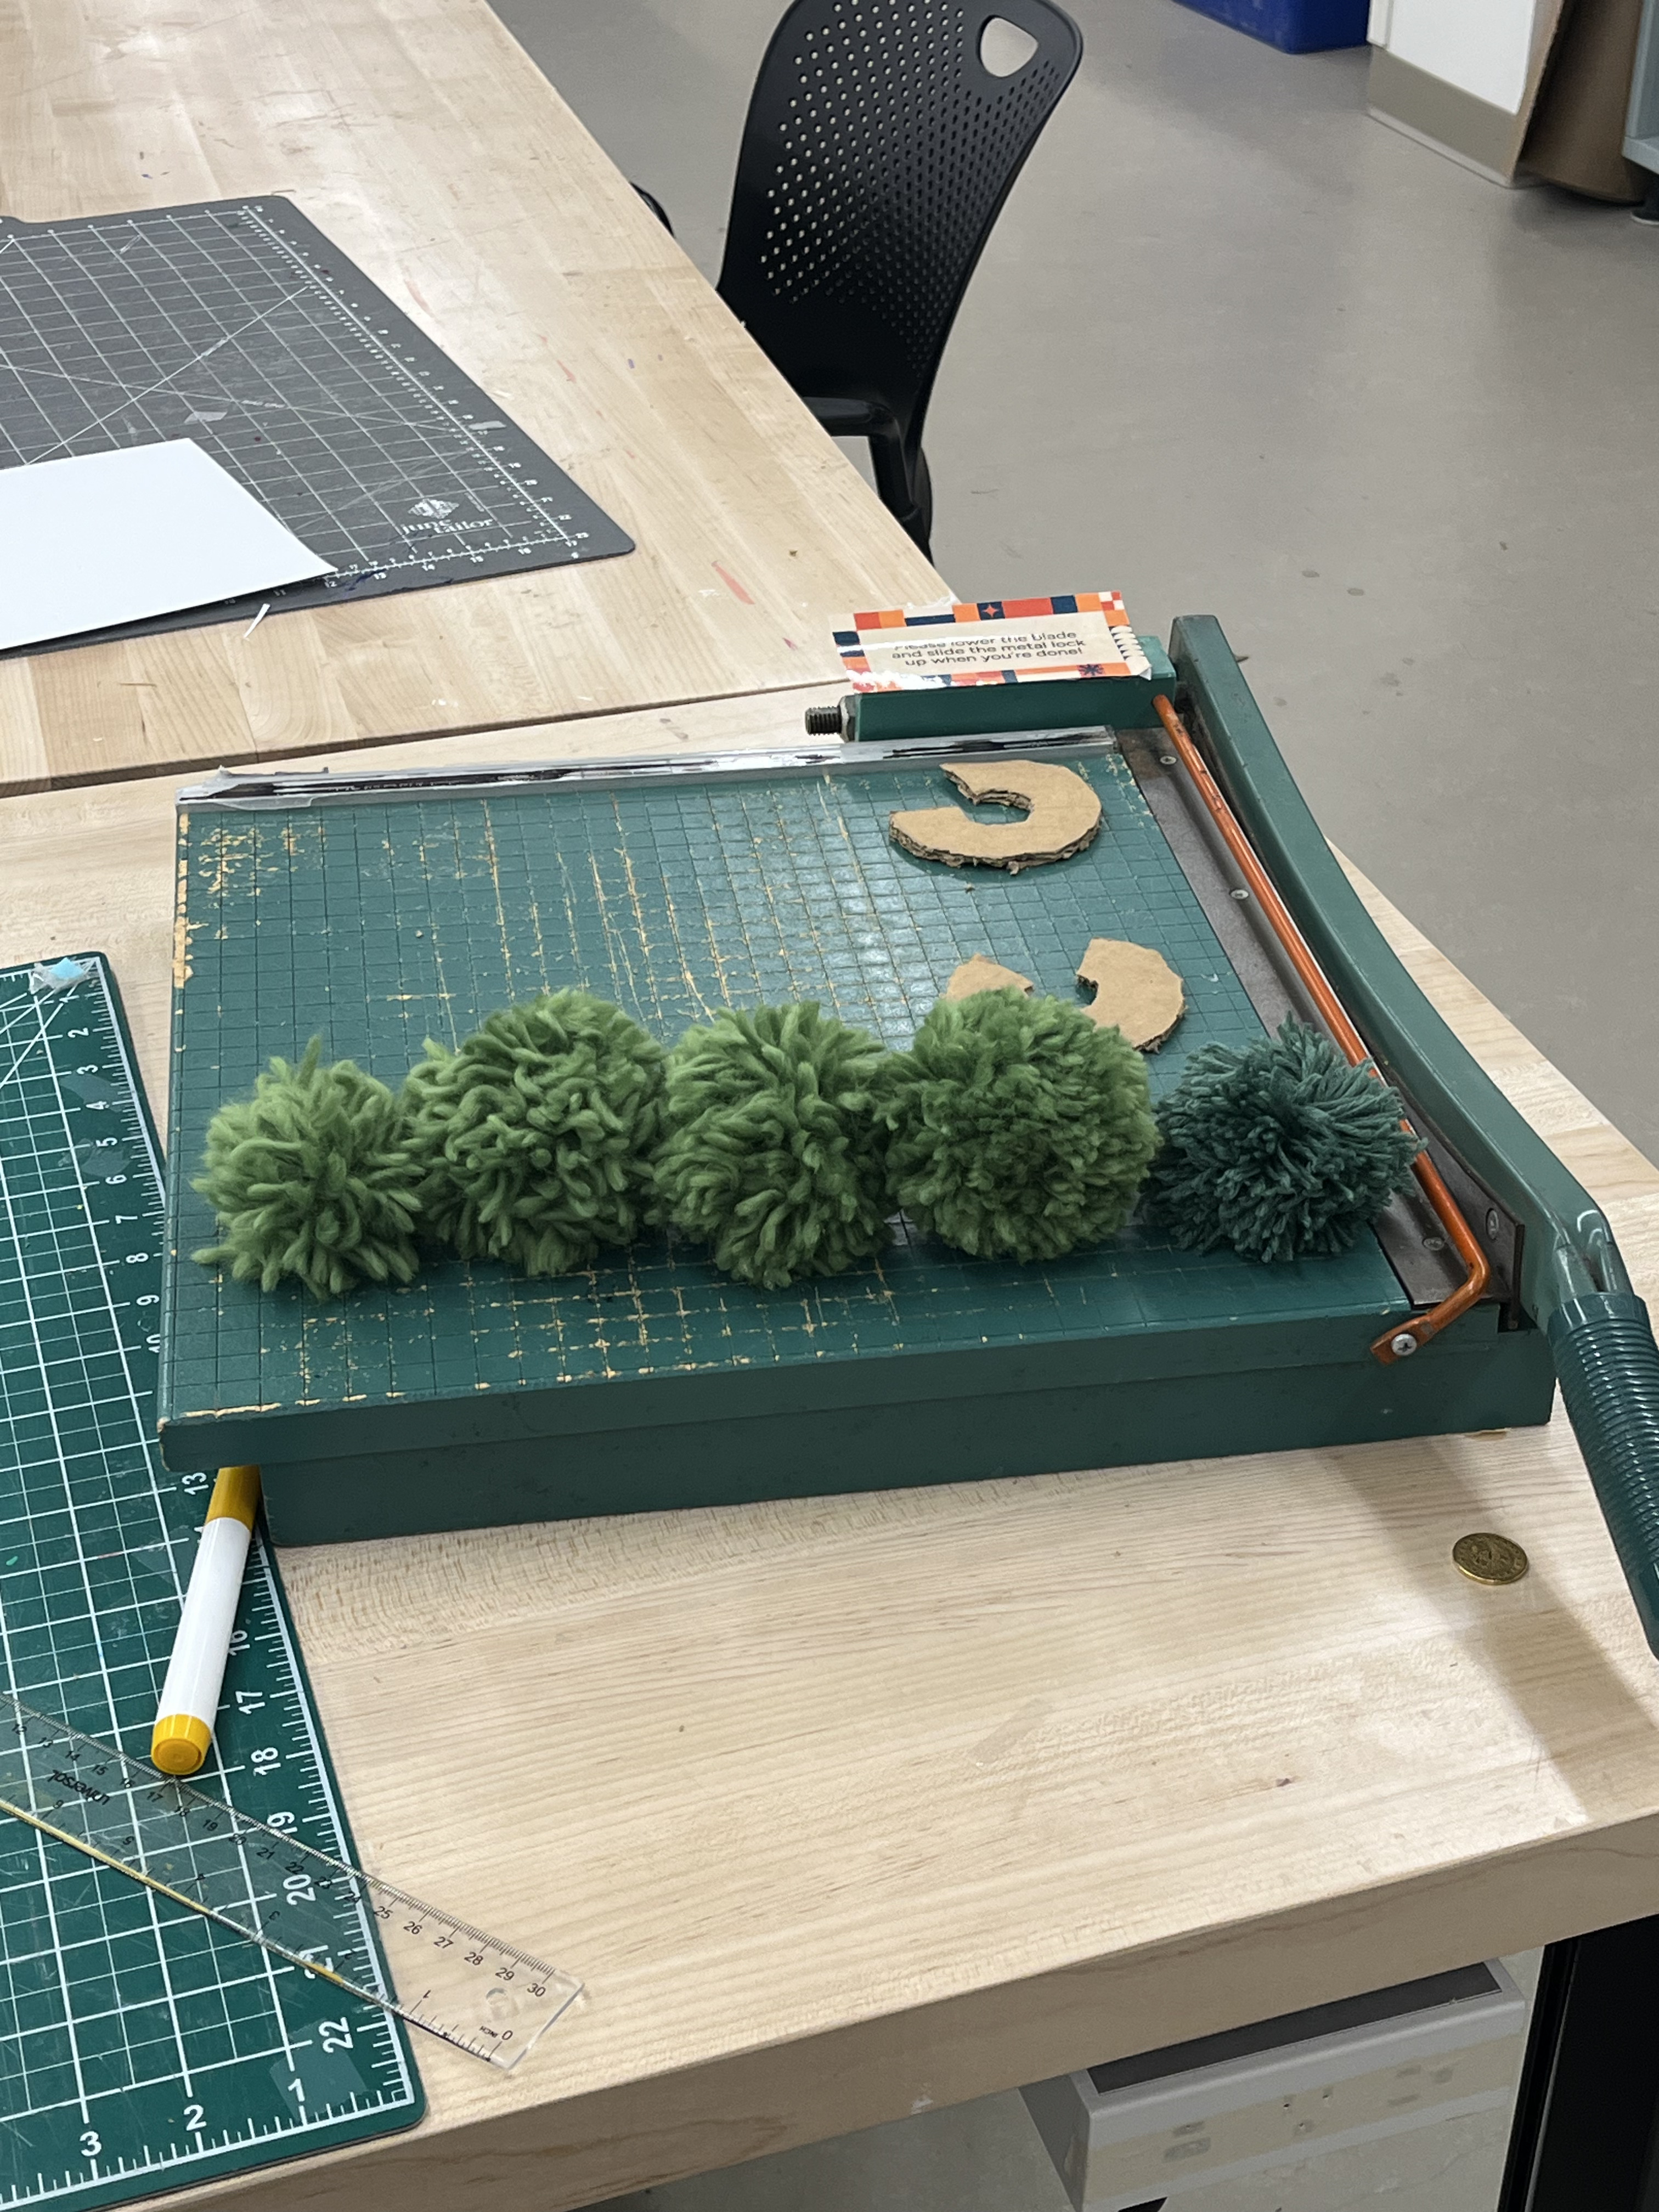
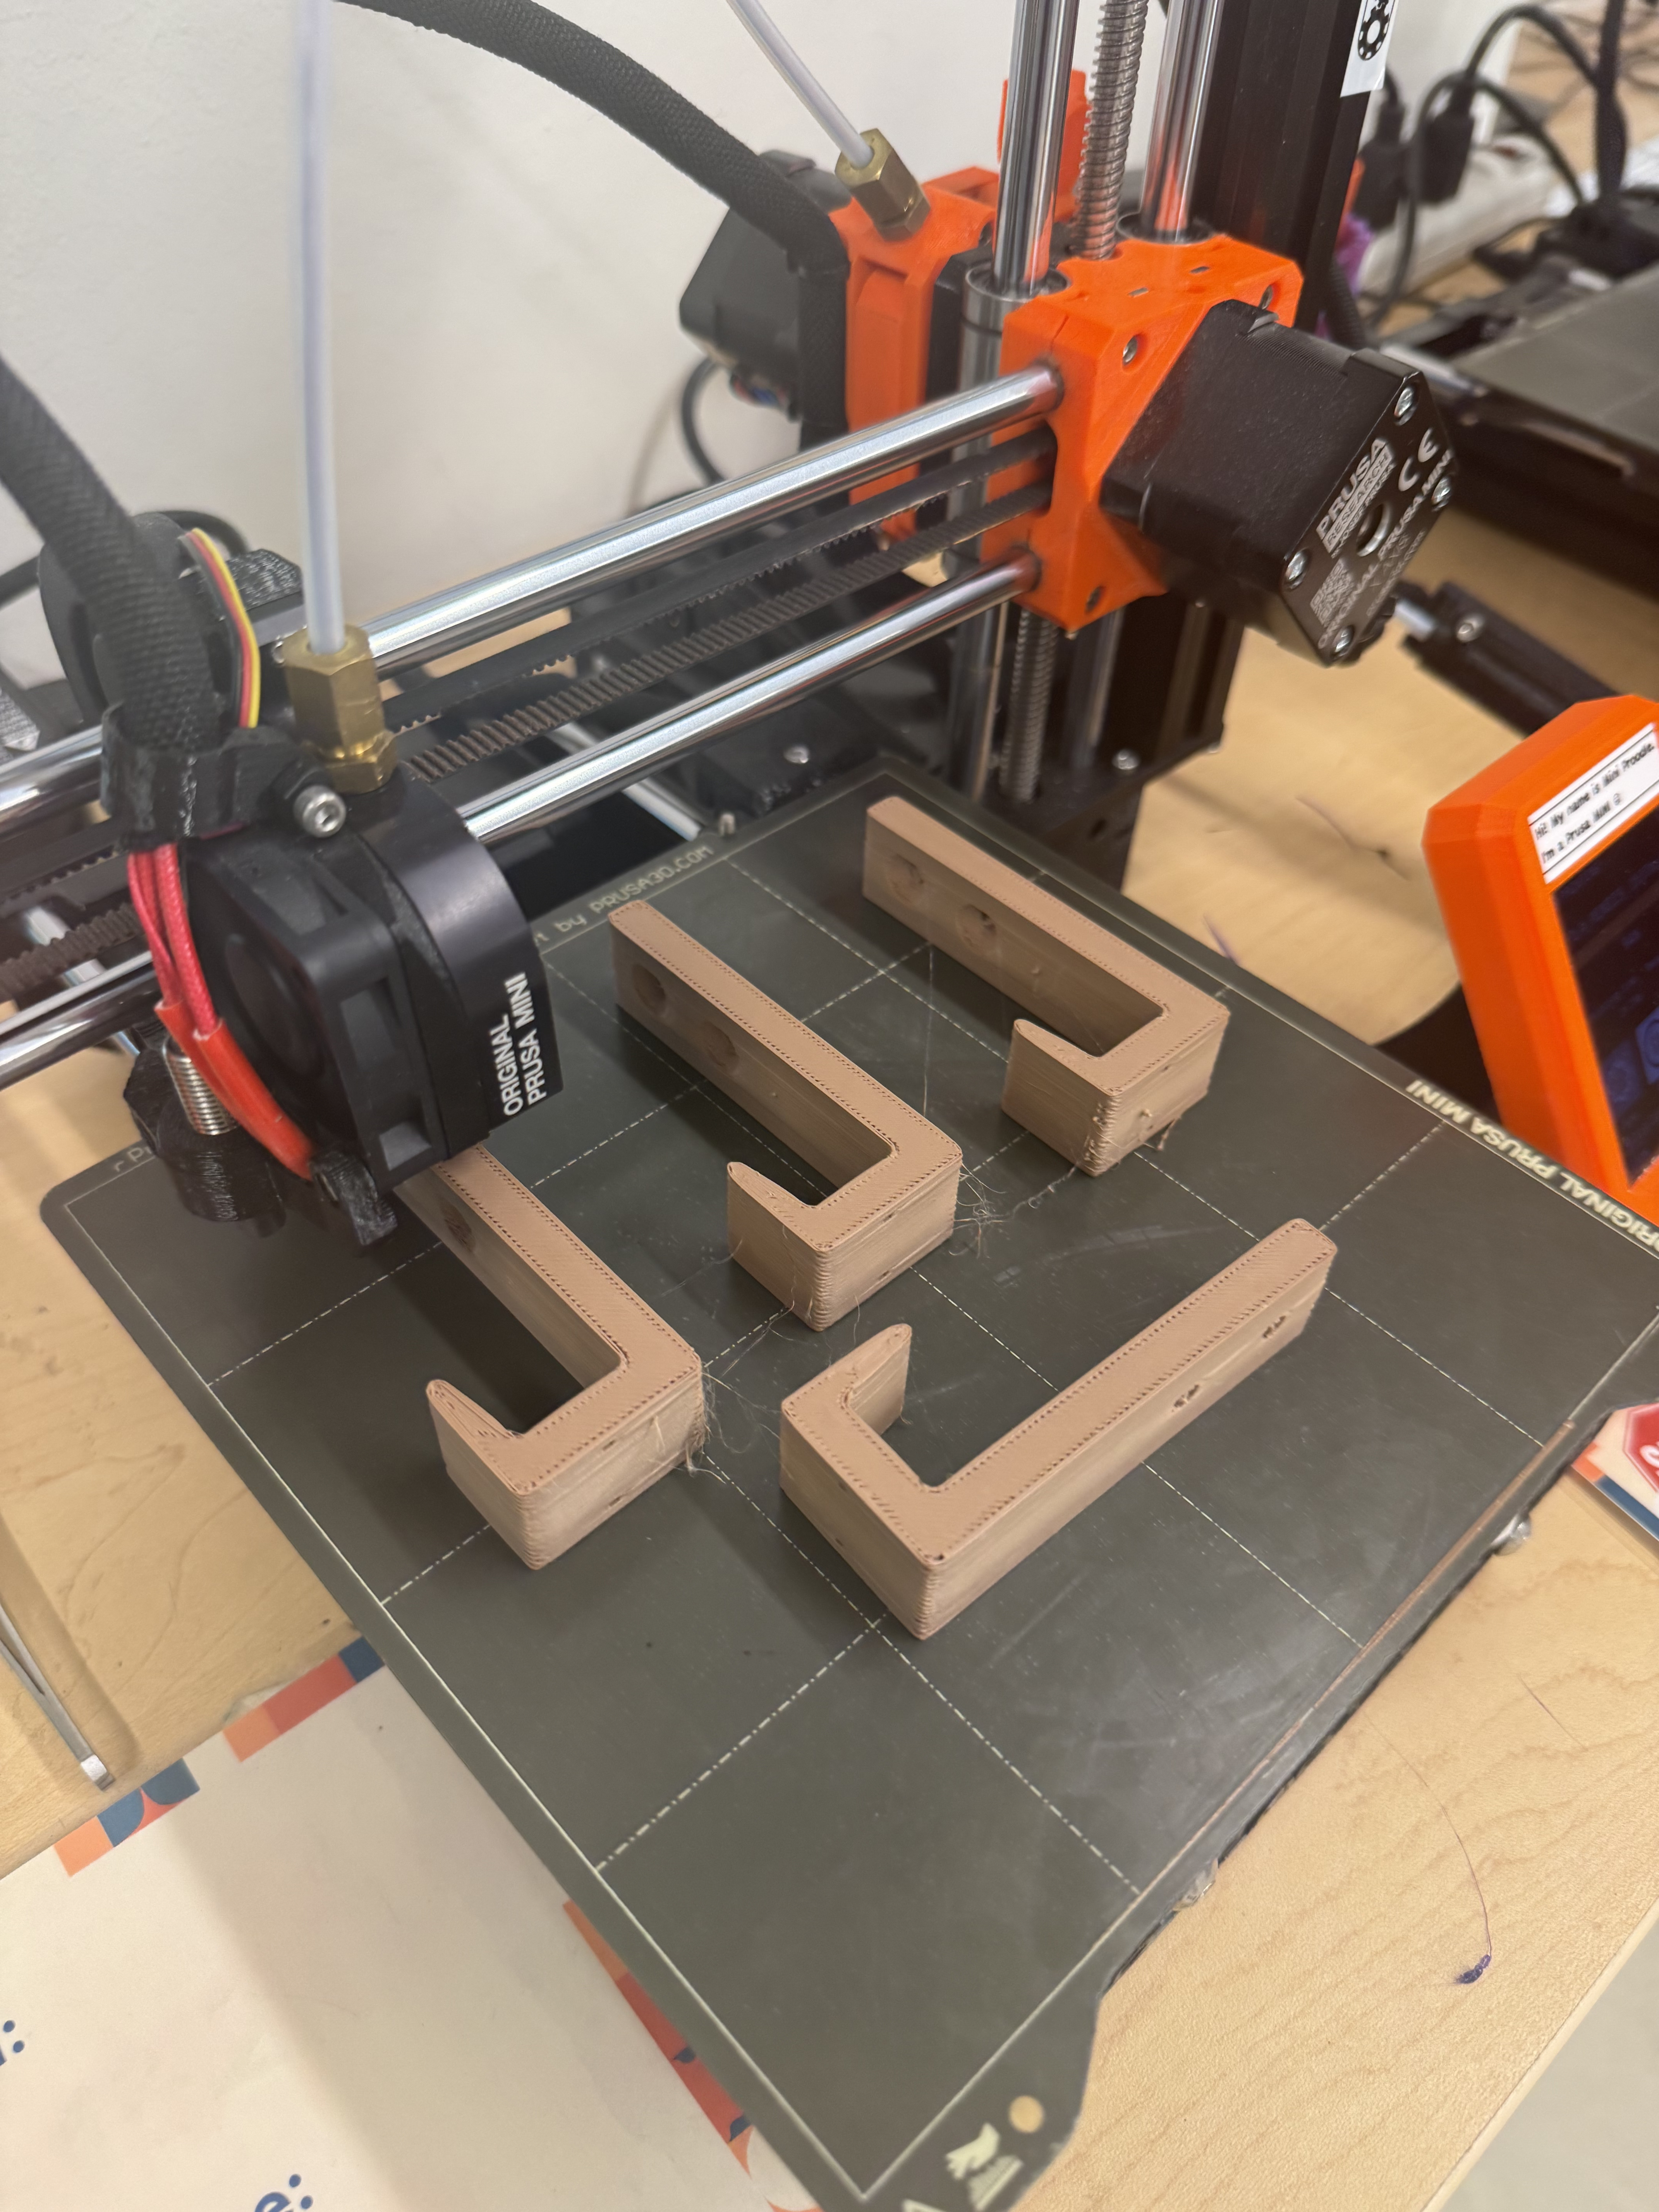
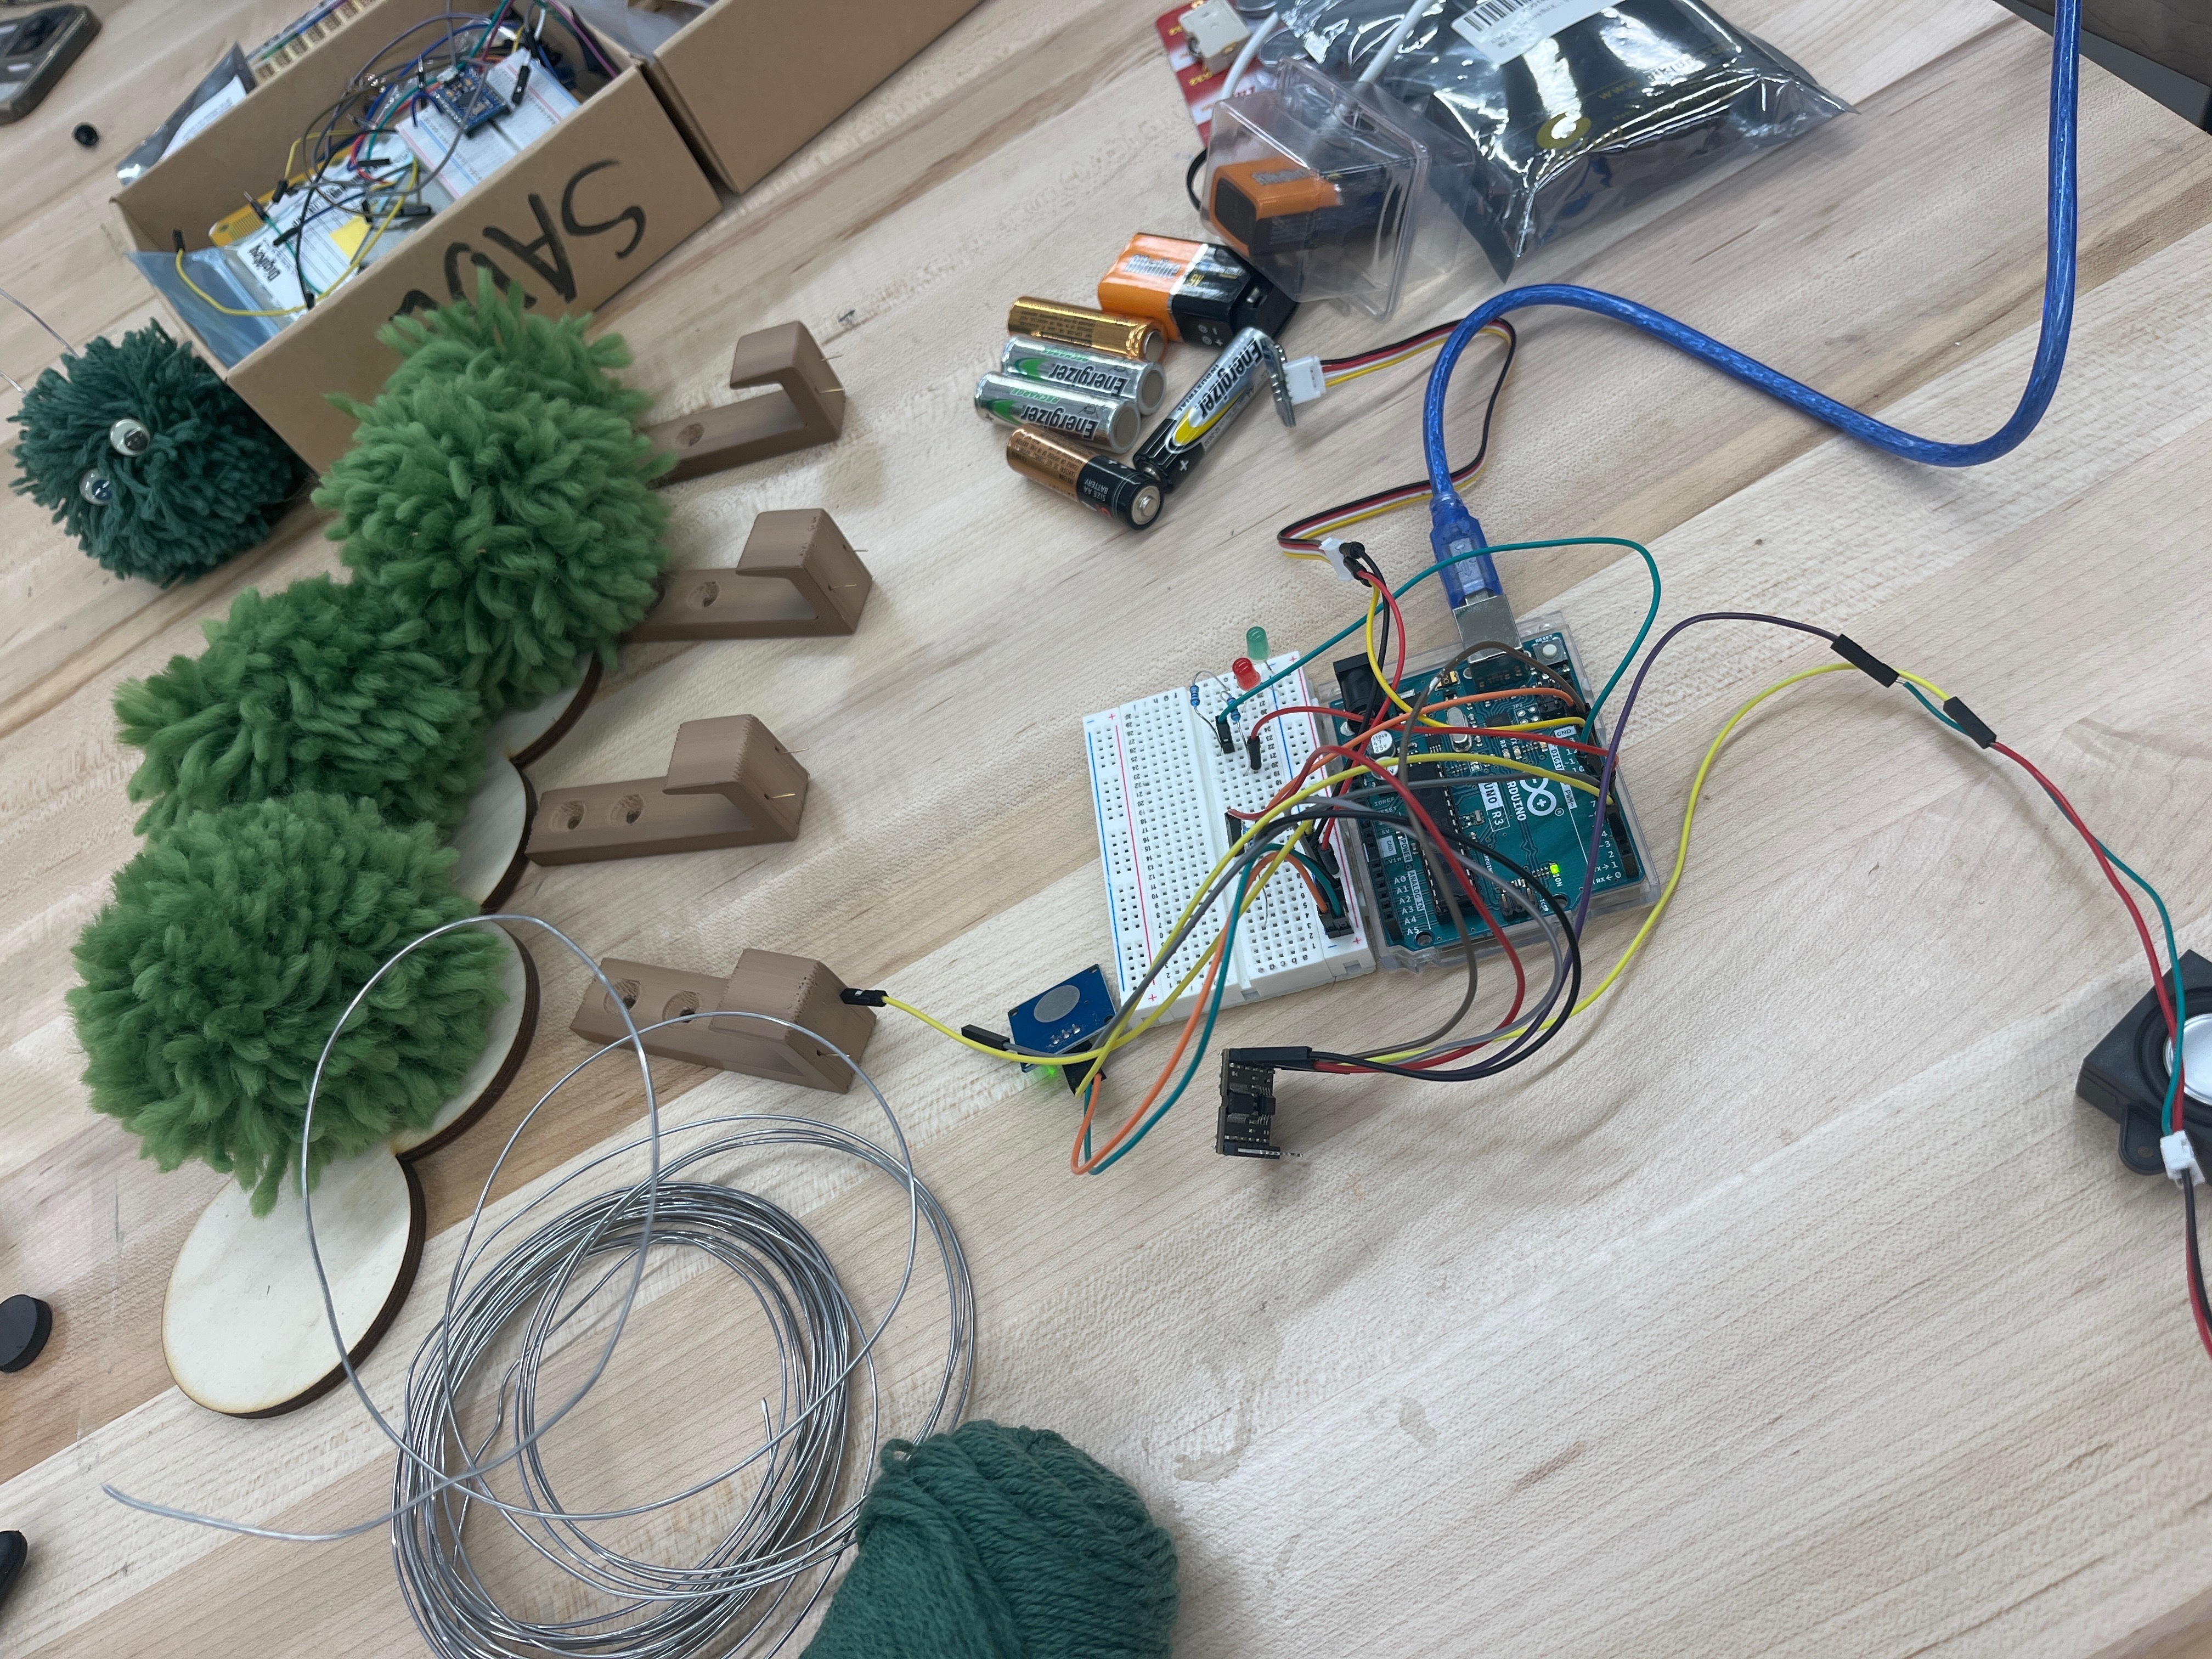
Design Process & Artifacts
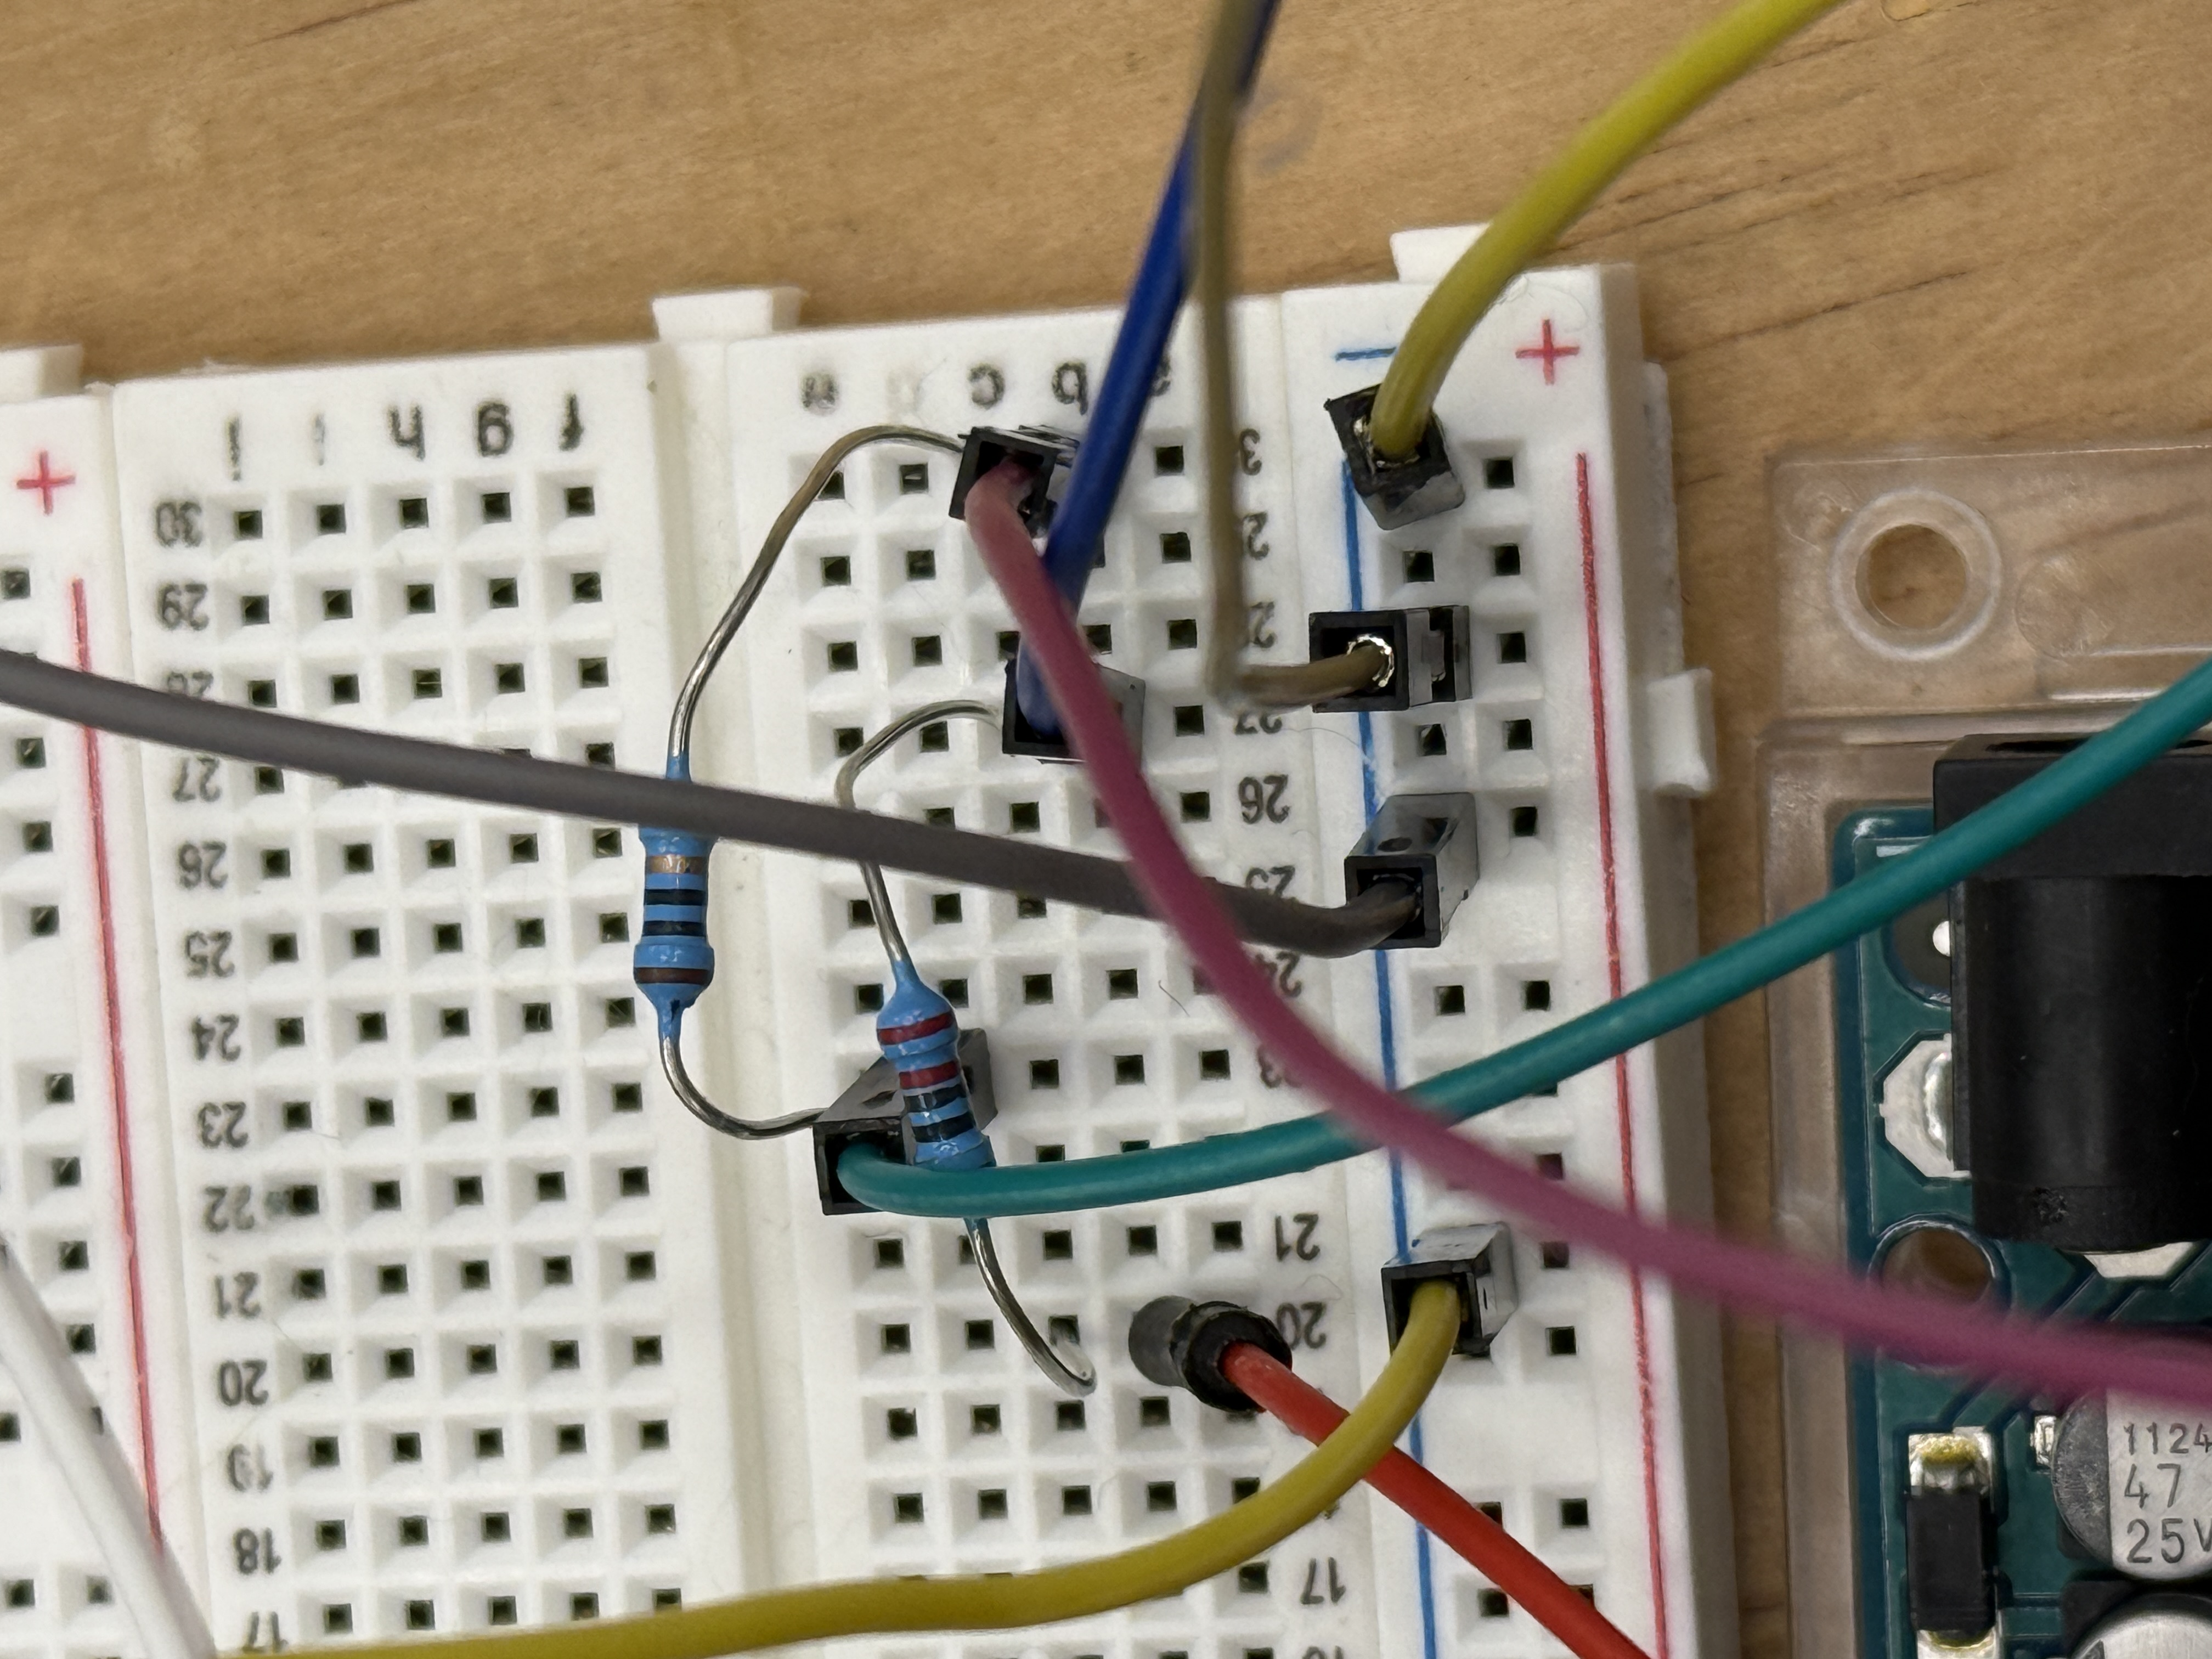
Our design evolved through several stages: initial brainstorming and concept sketches, low-fidelity physical mockups, circuit prototyping on a breadboard, laser-cut wooden segments, and final assembly with embedded electronics.
Prototype Demonstration
A video demonstrating the working prototype: how items are hung, the touch-to-start interaction, sequential reed switch checking with audio/haptic/visual feedback, and the "all clear" state.
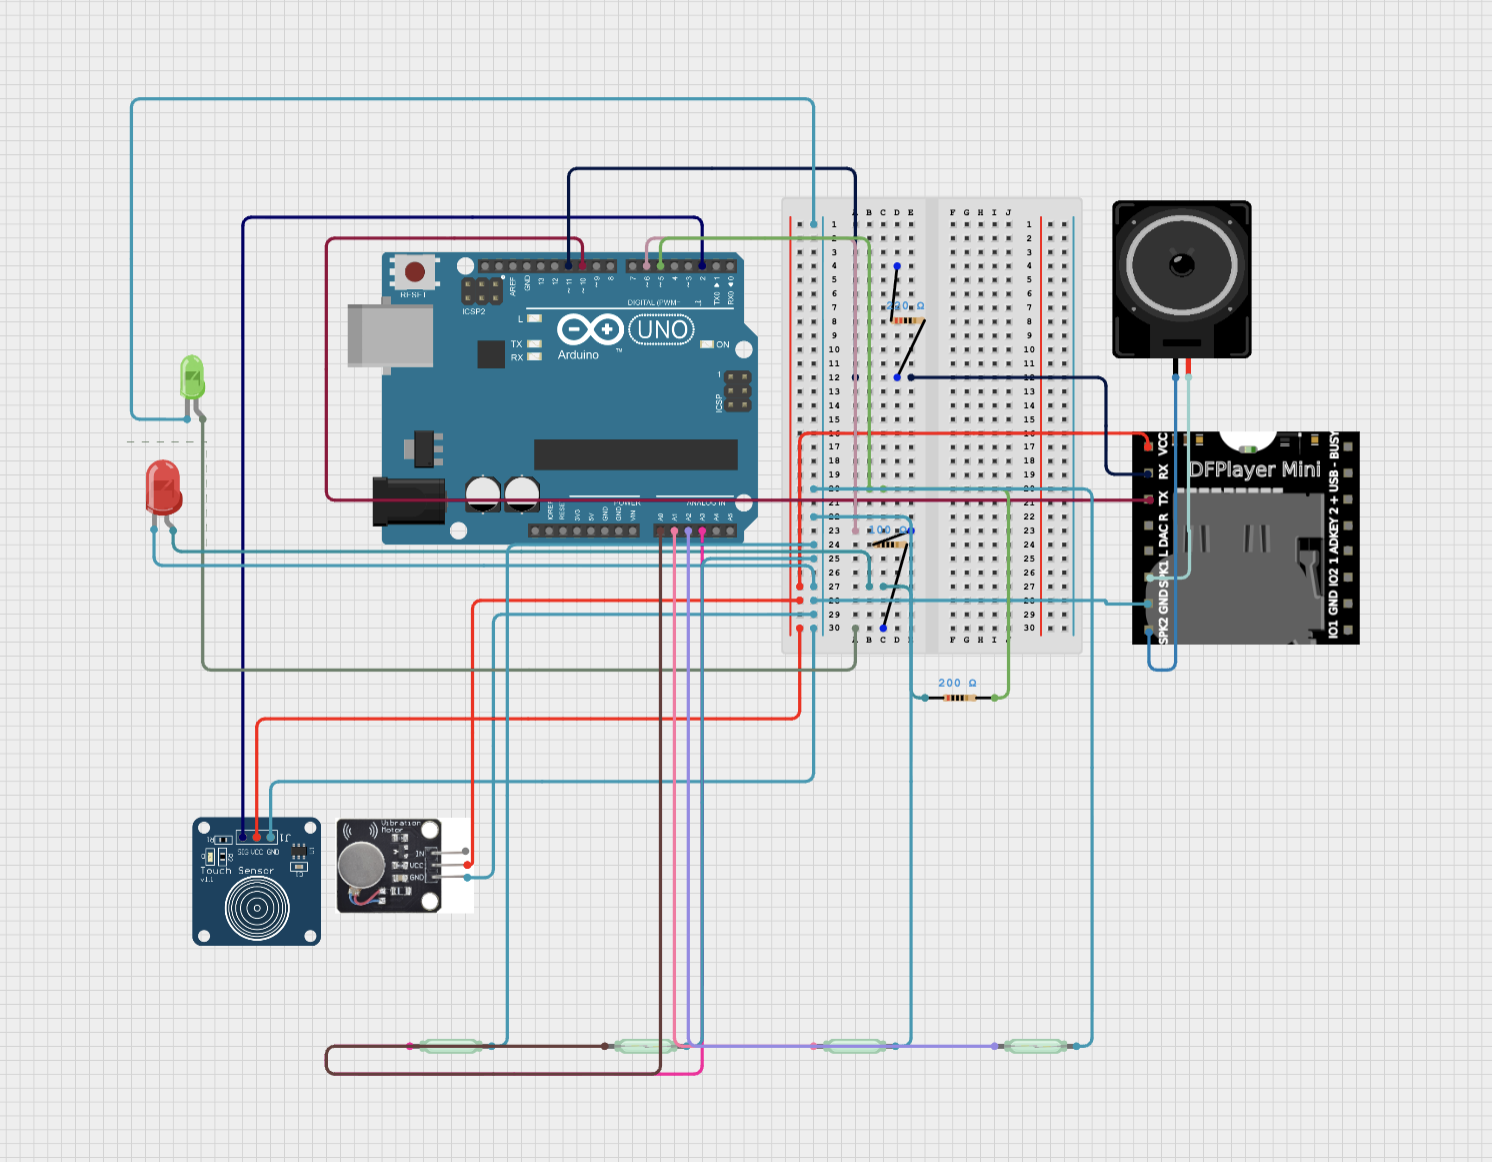
Components
Main microcontroller
Detect items via magnets (A0–A3)
Capacitive touch on pin 2
Haptic feedback on pin 9
Status indicators (pins 5 & 6)
MP3 playback (pins 10 & 11)
Technical Details
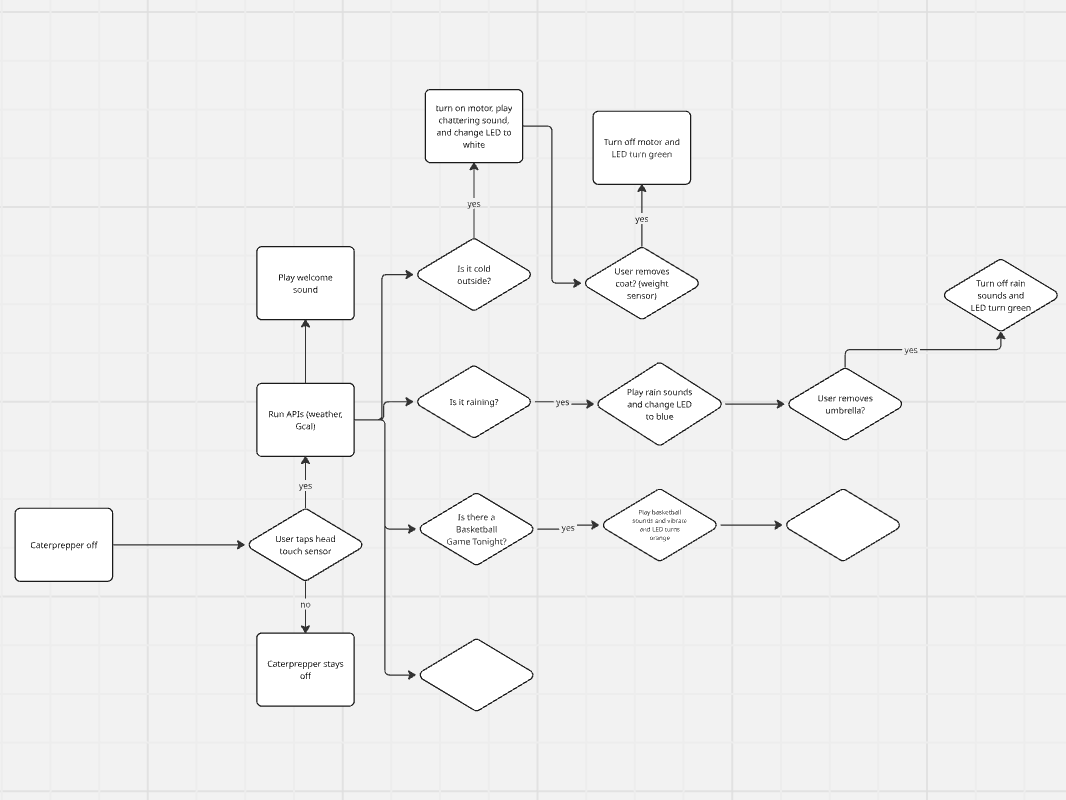
The system is driven by a finite state machine. After a touch press, it checks each reed switch in sequence, playing the corresponding audio prompt and activating the motor until the user removes the item.
| State | Behavior | Transition |
|---|---|---|
| IDLE | All outputs off; waiting for touch | Touch → START_DELAY or DONE_GREEN |
| START_DELAY | Green blink + welcome sound; 3s countdown | After 3s → check reeds |
| ACTIVE_REED2 | Red LED, motor on, playing track 2 | Magnet removed → WAIT_REED3 |
| WAIT_REED3 | Checking reed 3 | Clear → DONE_GREEN; detected → ACTIVE_REED3 |
| ACTIVE_REED3 | Playing track 3 | Removed → WAIT_REED4 |
| ACTIVE_REED4 | Playing track 4 | Removed → WAIT_REED1 |
| ACTIVE_REED1 | Playing track 5 | Removed & clear → DONE_GREEN |
| DONE_GREEN | Green LED, success chime | Touch → IDLE |
Dependencies
#include <SoftwareSerial.h>
Creates a serial connection on pins 10/11 to communicate with the DFPlayer Mini, keeping hardware serial free for debugging.
#include <DFRobotDFPlayerMini.h>
High-level interface to the DFPlayer Mini — volume control, track playback from SD card, and playback event detection.
Source Code
Core logic showing the IDLE and START_DELAY states. Full source with inline comments is in the GitHub repository.
void loop() {
  switch (currentState) {

    case IDLE:
      digitalWrite(motorPin, LOW);   // motor off
      digitalWrite(redLED, LOW);     // red off
      digitalWrite(greenLED, LOW);   // green off

      if (newTouchPress()) {
        if (anyItemPresent()) {
          playTrack(1);               // welcome sound
          startTime = millis();
          currentState = START_DELAY;
        } else {
          goGreen();                 // nothing to grab!
        }
      }
      break;

    case START_DELAY: {
      unsigned long elapsed = millis() - startTime;

      // blink green during 3-second countdown
      if ((elapsed > 100 && elapsed < 300) ||
          (elapsed > 500 && elapsed < 700)) {
        digitalWrite(greenLED, HIGH);
      } else {
        digitalWrite(greenLED, LOW);
      }

      if (elapsed > 3000) {           // begin checking reeds
        if (anyItemPresent()) {
          digitalWrite(redLED, HIGH);
          digitalWrite(motorPin, HIGH);
          // → first active reed state
        } else {
          goGreen();
        }
      }
      break;
    }
    // … remaining states follow same pattern
  }
}
Getting Started
Download the Arduino IDE (v2.x recommended).
Library Manager → install DFRobotDFPlayerMini. SoftwareSerial is built-in.
Reed switches → A0–A3, touch → 2, motor → 9, red LED → 5, green LED → 6, DFPlayer → 10/11.
FAT32 format. Create mp3 folder with files 0001.mp3–0006.mp3.
Select Arduino UNO, upload sketch, open Serial Monitor at 9600 baud.
Roadmap
Expand segment types and configurations to fit different user needs and routines.
More nuanced, personalized vibration patterns for each segment.
Individual lighting per segment for specific visual cues.
Customize preferences, sync schedules, and adjust behaviors via mobile app.
Repository
All source code with inline comments, plus the full README, are available on GitHub.
View on GitHub ↗